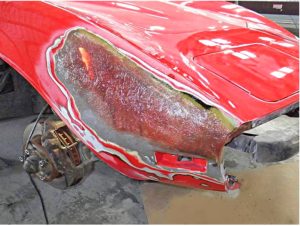
Mending Fiberglass from both sides
Repairing a hole in a fibreglass boat from both the inside and outside involves a thorough process to ensure the structural integrity and, if the job is a boat, its water-tightness. This dual approach reinforces the repair, making it more durable. Here’s how you can tackle this job:
Materials and Tools Needed
- Fiberglass cloth
- Fiberglass resin and hardener
- Sandpaper (various grits)
- Acetone or a similar solvent for cleaning
- Mixing cups and sticks for resin
- Paintbrushes
- Disposable gloves
- Safety glasses
- Masking tape
- Scissors or a utility knife
Preparing for the Repair
- Safety First: Wear protective gear such as gloves and safety glasses. Ensure you are working in a well-ventilated area.
- Clean the Area: Clean around the hole both inside and outside the boat using acetone or a suitable solvent. This removes grease, oil, and dirt for better adhesion.
- Sand the Repair Zones: Sand around the hole on both sides of the boat with coarse-grit sandpaper, then switch to finer grits. Create a roughened area larger than the hole to provide a good surface for the resin to bond.
Inside Repair
- Cut the Fiberglass Cloth: Measure and cut several layers of fibreglass cloth, making each layer progressively larger than the hole to cover it adequately from the inside.
- Mix Resin and Hardener: Follow the manufacturer’s instructions to mix the resin and hardener in a mixing cup.
- Apply Fiberglass Cloth: Apply a layer of resin to the inside area around the hole. Place the smallest piece of fibreglass cloth over the hole and press it into the resin. Apply resin over this layer, then place the next layer of fabric, repeating until all inside layers are applied. The largest piece should cover the entire area you’ve prepared.
- Cure: Allow the resin to cure as per the instructions.
Outside Repair
- Prepare the Outside: Once the inside repair is cured and solid, move to the outside. Sand around the repaired area to ensure the outside layers will adhere well.
- Cut Fiberglass Cloth: Similar to the inside repair, cut layers of fibreglass cloth, this time sized to cover the hole from the outside, with each layer slightly larger than the one beneath it.
- Apply Fiberglass Cloth and Resin: Apply resin to the sanded area around the hole. Place the first (smallest) layer of cloth over the hole, apply resin, and continue layering, pressing out any air bubbles.
- Cure and Sand: Allow the resin to cure fully. Then, sand the repaired area starting with a coarse grit and moving to finer grits until it’s smooth and level with the boat’s surface.
Finishing Touches
- Clean: Clean the repaired areas with acetone to remove dust from sanding.
- Paint (Optional): If desired, paint the repaired areas to match the boat’s colour. Use paint suitable for fibreglass and marine environments.
Additional Tips
- Ensure the resin and hardener mixture is accurate to avoid a tacky or improperly cured repair.
- Temperature and humidity can affect the curing process, so consider environmental conditions when planning your repair.
- For larger holes, starting with the inside repair might be easier to ensure the structure is supported when working on the outside.
This process reinforces the repair from both sides, ensuring a strong, durable fix. If the hole is large or if the boat’s structural integrity is compromised, consulting a professional may be advisable for safety reasons.
Call (02) 9820 1595
For Expert fibreglass advice
or send a message below
We help you create successful projects.
Since opening in 1951 our range of products has grown massively. So has our knowledge. There is not much we haven't seen before so call us first. We can save you making costly mistakes.


