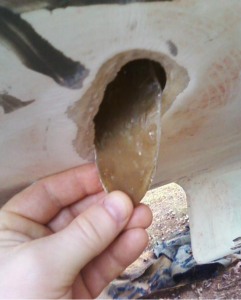
Fixing A Hole in Your Fibreglass Boat
 Fixing a large hole in a fibreglass canoe involves a process that requires patience, precision, and some basic materials. Here’s a step-by-step guide to help you repair it. Safety is paramount, so wear gloves and safety glasses and work in a well-ventilated area.
Materials Needed
- Fibreglass cloth
- Fibreglass resin and hardener
- Sandpaper (various grits from coarse to fine)
- Acetone or a similar cleaning solvent
- Mixing cups and sticks
- Paintbrushes
- Disposable gloves
- Safety glasses
- Masking tape
- Scissors or a utility knife
Step-by-Step Instructions
- Prepare the Area
- Clean the Canoe: Ensure the area around the hole is clean and dry. Use acetone or a cleaning solvent to remove any oil, dirt, or water.
- Sand the Area: Sand around the hole with coarse-grit sandpaper to create a rough surface for better adhesion. Sand an area larger than the hole itself, gradually transitioning to finer grit sandpaper.
- Cut the Fiberglass Cloth
- Measure and Cut: Measure the area of the hole and cut several layers of fibreglass cloth that gradually increase in size, allowing each layer to extend beyond the edge of the previous one for better coverage and strength.
- Mix the Resin
- Prepare the Resin: Mix the fibreglass resin and hardener in a mixing cup following the manufacturer’s instructions. Ensure you have enough to cover all the layers of fibreglass cloth you’ve prepared.
- Apply the Fibreglass Cloth
- First Layer: Apply a coat of mixed resin to the sanded area around the hole. Place the smallest piece of fibreglass cloth over the hole and gently press it into the resin with a brush. Ensure there are no air bubbles.
- Additional Layers: Apply more resin over the first layer, then place the next larger piece of cloth over the first. Repeat this process, applying resin between layers and on top until all pieces have been used. The largest piece should cover the entire repair area.
- Cure and Sand
- Let It Cure: Allow the resin to cure as per the manufacturer’s instructions. The curing time can vary depending on the resin type and environmental conditions.
- Sand Smooth: Once cured, sand the repaired area starting with coarse-grit sandpaper and gradually moving to finer grits until the surface is smooth and flush with the rest of the canoe.
- Finish the Repair
- Clean the Area: Wipe down the repaired area with a clean cloth and some acetone to remove any sanding dust.
- Paint (Optional): If desired, you can paint the repaired area to match the rest of the canoe. Use a paint that’s suitable for fibreglass and outdoor use.
- Final Inspection
- Inspect the Repair: Carefully inspect the repair to ensure it’s smooth and there are no gaps or sharp edges. The repaired area should be as smooth and uniform as possible.
Additional Tips
- Work in a shaded, well-ventilated area to avoid direct sunlight, which can cause the resin to cure too quickly.
- If the hole is large, consider applying the repair process to both sides of the canoe for added strength.
- Always follow the safety instructions on the materials used, especially when working with fibreglass resin and acetone.
This guide should help you repair a large hole in your fibreglass canoe, restoring its functionality and extending its life. Consider consulting a professional if you’re unsure about any step or if the damage is extensive.
Call (02) 9820 1595
For Expert fibreglass advice
or send a message below
We help you create successful projects.
Since opening in 1951 our range of products has grown massively. So has our knowledge. There is not much we haven't seen before so call us first. We can save you making costly mistakes.

